
Hi there! Well, I couldn't wait to show you the project my mom and I spent the afternoon working on. Last week my mom attended an Annie Sloan Chalk Paint class and she loved it and learned so much. I couldn't attend (my babysitter was at the class - ha!) but she promised to share all that she learned with me.
For a while now I've wanted to paint some sort of flag wall art to hang in our upstairs office area (our "theme" is old schoolhouse). I've had my eye on the painted American flag they sell at Pottery Barn but didn't want to pay the price they sell it for. Then my mom had the idea of using the techniques she had learned to paint this flag and we decided to both make one.
Let me tell you, I fell in love with this paint and all the possibilities. Now I'm dreaming up everything I can use it on!
Here's the tutorial if you are interested.

These are our supplies. You've probably heard of this paint being expensive, but it does go far and we ordered extra for some additional projects. In the end we calculated this project costing us $26 for each flag and it took us about 3 hours start to finish.
- Cut piece of pine plywood 26"x48" (which we lightly sanded)
- Coco ASCP
- Emperor's Silk ASCP
- Napoleonic Blue ASCP
- Old White ASCP
- ASCP Clear Wax
- ASCP Dark Wax
- Lots of brushes

The first step is to paint your board with the paint color Coco. We covered this pretty thoroughly since this is the color that would show through once we distressed the flag.

Next we drew outlines with a pencil for the stripes and a rectangle for the stars. Since there are 13 stripes, we measured ours 2" wide. The rectangle dimensions are 14"x20".

Next we painted the stripes and the rectangle. (The red paint is Emperor's Silk, the blue is Napoleonic Blue and the white is Old White.) We didn't worry about the painting being perfect; in fact, we wanted it to look old and distressed so a lot of the Coco background shows through.

Next came painting the stars. This was a little more challenging and I don't have one great tip to share with you... I pretty much winged it by measuring and marking with a pencil a spot where each star would be painted.

We used a "stencil" we made simply by printing out a star onto a piece of cardstock and cutting it out.

Now came the fun part... the wax! At this point we could see our flags had potential but my mom promised they were going to look great by the time we used the wax techniques she had learned.
We applied a coat of clear wax all over the flag in a circular motion and followed by buffing it with an old t-shirt.

Next we distressed with sandpaper. I only sanded the edges of my flag... the flag already looked very distressed since my painting was deliberately light in some areas.

Next we used the dark wax to create that old antique look. I was scared to apply this wax... look how dark it is!

And when I first applied it I definitely had an "oh no" moment because this was a little more of a primitive look than I wanted Then my mom remembered she had learned that to remove the dark wax, you can simply apply the clear wax again and buff it out.

We were so excited then because the look it created was exactly perfect! If you look closely at the picture above, you can see in the stripes area on the top of the flag that the white has a definite yellow tint... the lower half has an antique look, but is still white, which is the look that was created by applying the clear wax again and buffing after the dark wax. Pretty neat!
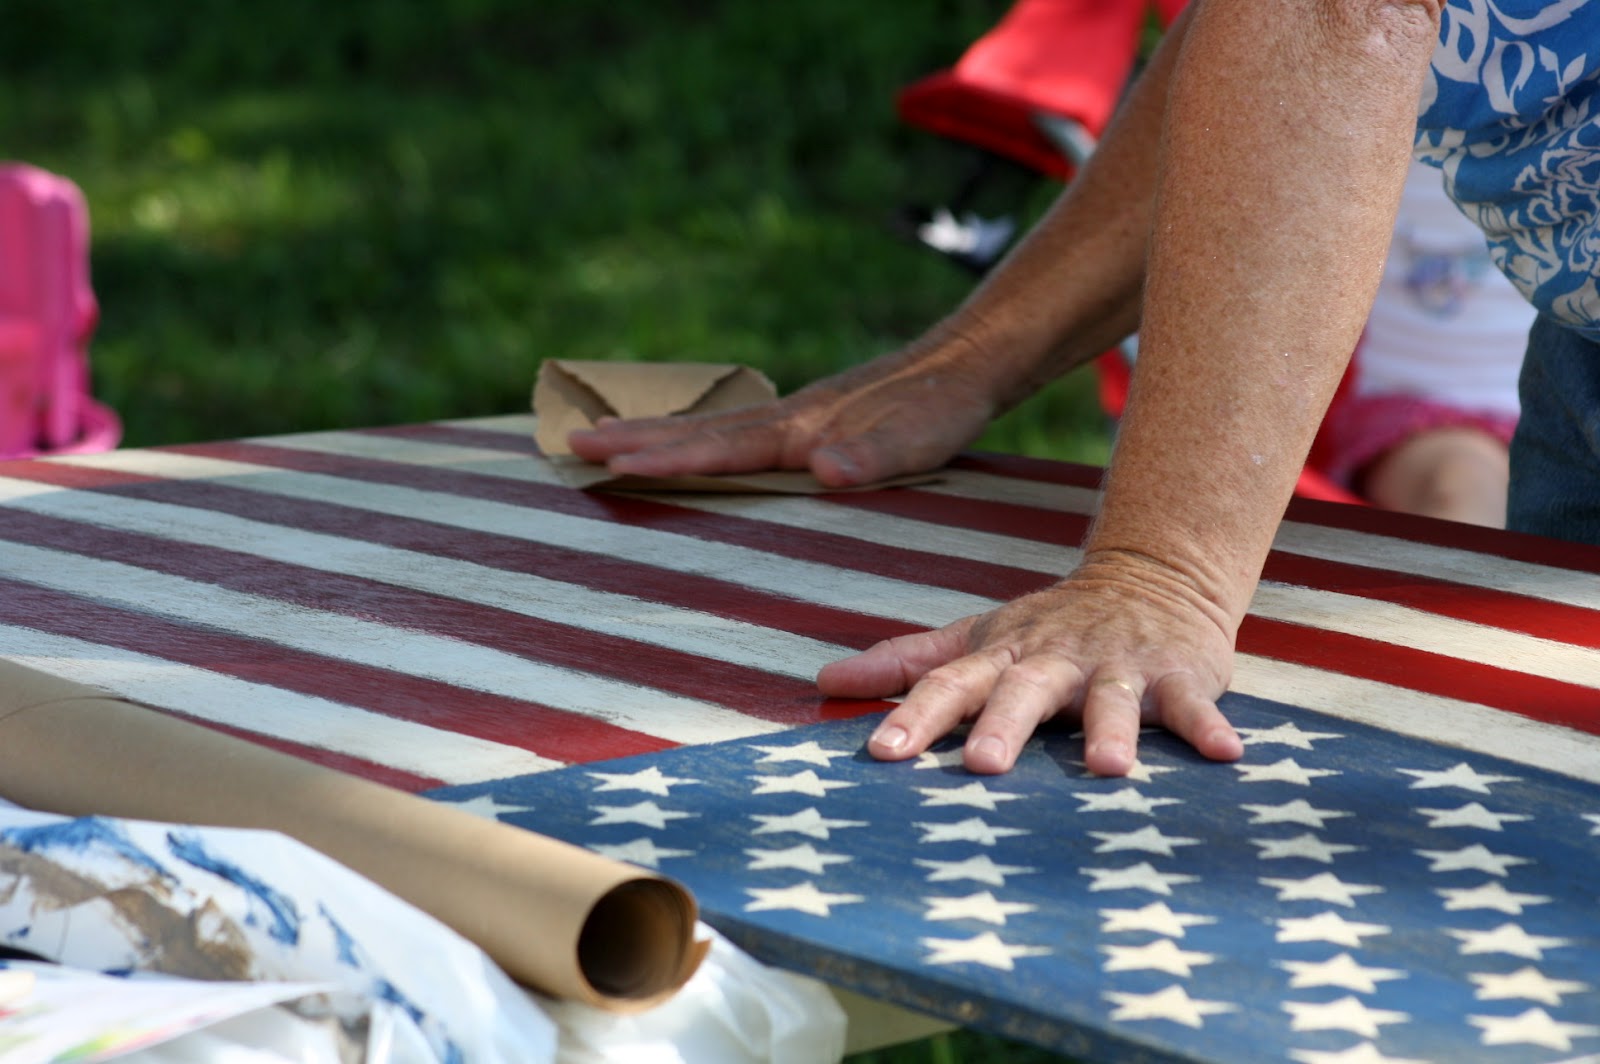
We finished by rubbing Kraft paper all over the flag... this creates a sheen and gives the flag a smooth finish.

I really loved working with Annie Sloan Chalk Paint. I thought it was amazing how the layers of paint, the distressing, the waxing, all created such an "old" look. I don't think anybody would ever guess that this is just plywood!

You'll see my flag again once I figure out how to hang it! This flag is actually pretty heavy, so I'll let my husband take over now. (smile)
Hope you are enjoying your weekend!
Sure is pretty! But how expensive is that paint? May be out of my price range...
ReplyDeleteBrenda
That looks so good. Did not know the paper trick for shine.
ReplyDeleteIt was the funnest project I've done in a LONG time. Can't wait to hang mine on my sleep porch! Thanks for doing it with me. xoxoxo ~ Mom ~
ReplyDeleteThat is gorgeous! I love that you and your mom did this together. What fun you ladies have!
ReplyDeleteCan't wait to see what you do with it. Again I say...you are so talented!
Love it! I want one :) Thanks for sharing!
ReplyDeleteYou girls are going to be pros by the time I get there! What a fabulous project! Can't wait to see them hung. xoxo
ReplyDeleteWell done, it looks amazing - really awesome tutorial - I have AS Old White and both clear and dark waxes but haven't really started using yet. Takes me a while to get into projects and life has been keeping much too busy, you have me inspired big time.
ReplyDeleteThat turned out GREAT- I absolutely love it- I love all flags anyway- xo Diana
ReplyDeleteLove the flag..LOVE ASCP!! Very, very hooked..only have 13 colors plus waxes, A real sickness! Great project!
ReplyDeleteI LOVE it! I'm a softie for the Americana look.
ReplyDeleteFabulously done! Lots of respect!
ReplyDeleteAnnie
this is beautiful and so is that first picture!! thanks for the tutorial and tips -kraft paper, can't wait to see where you hang it in your home.
ReplyDeleteSometimes I think I'm the last person in the world to try chalk paint. A few more tutorials like this one, and I'm going to have to take the plunge! :-) It's beautiful--looking forward to seeing where you hang it.
ReplyDeleteI am taking a class next week-end. I love the paint.
ReplyDeleteI'm in love with your flag!! I have yet to try ASCP, but after seeing your project, I'm sold on the idea. I can't wait to see it in your home!
ReplyDeleteHello! I think you both did an excellent job with this project! Love how it all came out. ;) I just started using ASCP within the last few weeks after winning it from a prior giveaway, and so far I love it! I'll be blogging about my projects in the near future. :) Thanks for sharing your tutorial.
ReplyDeleteBest,
Jessie
Nice!! I'm lovin' it.
ReplyDeleteI love this flag!!! Thank you for sharing your tutorial!!!
ReplyDeletelove it!!! it is a beautiful way to honor our country!
ReplyDeletelove it, andrea!! the dark wax really makes a difference! i didn't get it, because i thought it would look too dark for all my white, but, i love it can be toned down with the clear was! thanks to your mom for sharing the info with us:)
ReplyDeleteYou did a fantastic job. Don't forget to show us a picture when it's hung and in place.
ReplyDeleteMove over Pottery Barn! Keeping It Cozy is moving on up!
ReplyDeleteBrenda
What a cute flag and it is prefect for your old school house theme! I am probably the last person to try ASCP but it is on my bucket list for sure.
ReplyDeleteThanks for sharing your beautiful flag! It's gorgeous. I love ASCP and it goes a long way so you can kinda justify the cost.
ReplyDeleteYou did a super job on that! Those kinds of art pieces can get so expensive at a store. The fact that you made your own is so special. It looks like it was done preofessionally!
ReplyDeleteI love your flag. I painted mine onto a pre-primed canvas, using regular acrylics. I guess that was before the chalk paint craze. I think you would get better coverage with ASCP. Thanks for the lesson.
ReplyDeleteWow, it's gorgeous, and your mom is pretty crafty!! I can't wait to see it in your house.
ReplyDeleteYour American flag is beautiful! I know it will look great in your school room.
ReplyDeleteMary Alice
I am an Annie Sloan girl myself! I love that stuff! Your flag is beautiful~you and your mom did a great job. I'm your newest happy follower and I hope you will stop over for a visit! I am running a terrific jewelry giveaway this week. Enjoy the day!
ReplyDeleteAngie
www.swededreamer.blogspot.com
This is great! I have never used ASCP, but I want to so bad! This is a great tutorial. I'd love for you to share it at my blog party, Twirl & Take a Bow at www.houseontheway.com. It's every Tuesday. I hope you can stop by!
ReplyDeleteLeslie
Your flag turned out great! And, how nice that you did it with your mom!
ReplyDeleteWhat an awesome job you did. So patient you are. I love it, and glad you shared it at my party.
ReplyDeleteOMG! You have inspired me to make a flag, too. Thanks for your tutorial. I have the waxes and I love them, but I didn't know about using the kraft paper. I cannot wait to see what you do with it now. (I am visualizing one hanging on my front porch right now!)
ReplyDeleteThis is wonderful,I been seeing bloggers take this on,and I want too also,thanks for sharing...I'm visiting from Debbiedoo's.
ReplyDeleteI swear I am the only person that hasn't joined the chalk paint craze. Your flag is great!
ReplyDeleteAdore this! And if you're trying to figure out where to hang it....I have the perfect back of a rustic shed:)
ReplyDeleteWOW! It looks fantastic! I've been loving what Luanne has done with AS paint, wanting to try some SO badly. But--first things first, & moving is at the top of the list :(
ReplyDeleteI've wanted a flag for some time.... Great tutorial and a beautifully finished piece, thanks for sharing!
ReplyDeleteI'm going to attempt to do my son's headboard and footboard honestly bed patriotic he is going into the Marines and I want him to have a nice room to come home to. And him himself is very patriotic so wish me luck
ReplyDelete