Earlier this week I shared some spring time decorating in our living room and I promised to share the tutorial for the fabric flower garland I made.
Are you interested? If so, let's make some flowers!
- 1 yard of quilting fabric with plenty left over (I wanted some variety, so I purchased 1/4 yard each of four different fabrics)
- 1/8 yard of heavier fabric, such as drop cloth or felt (to use as backing)
- Button cover tool set
- Hot glue gun
- Twine
Begin by tracing your flower outline onto the fabric. However many petals your flower has is how many flower shapes you will need cut out. For example, my flower had 6 petals, so I needed 6 flower shapes cut out total per flower. For your outline, you could use a flower cookie cutter, an image printed out (like me) or even draw something freehand.
Cut out your flower shapes. This part is a little time consuming, depending of course upon how many flowers you need. I needed 6 flowers for my garland, so I had to cut out a total of 36 shapes.
Of course, I had my helpers along. We spread a blanket out on the deck in the sunshine and the time passed very quickly!
In addition to the patterned fabric shapes, I also cut out one shape per flower for the backing. I used drop cloth since I had some on hand, but felt would also work. For the garland I made, I had a total of 42 flower shapes cut out (6 shapes for the back and 9 shapes of each pattern).
Now we're ready to assemble the flowers.
1. Fold the shape in half.
2. Fold it in half again.
3. Do this for all 6 petals.
4. Place one of the folded petals onto the backing so that the petals line up.
5. Do this with each petal, overlapping as you go.
6. Finished and ready to sew!
I sewed a small circle around the center of my flower to secure the petals, but honestly you could probably do this with a hot glue gun if you don't own a sewing machine.
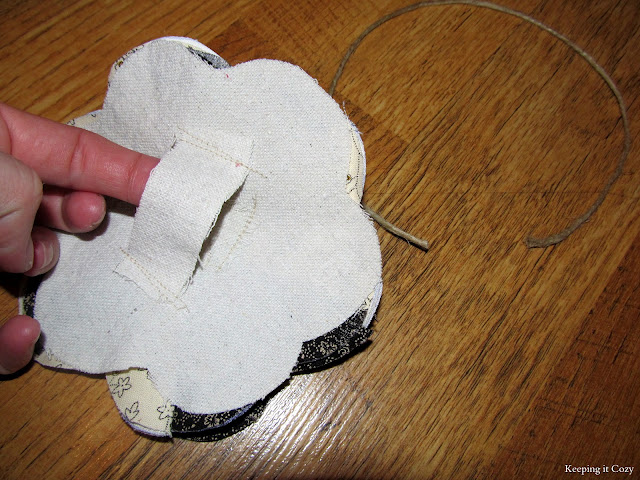
Now cut a small strip of drop cloth, or whatever backing material you are using, and sew it on the back. This is what you will string the twine through. You can tell I didn't care what the back of mine looked like (it was late)... I'm sure yours will look much nicer than this. (smile)
Almost finished... it's time to cover the buttons. Have you ever used a button cover tool kit? I'm probably the only one who hadn't before this, but my mom recently picked up a kit for me, and wow, did I love it. These buttons were a snap to make.
I not only glued the button onto the flower, but I also glued a small amount between the backing and quilting fabric. This prevents it from flapping once hung.
Finished! I created the garland by stringing two strands of twine through the back of each flower, but you could use anything.
I really had fun with this project. I want to display my garland for a while, so I used colors that would coordinate well with the rest of the living room, but seasonal patterns would sure be fun!
P.S. I promised you would have extra fabric... now you have enough to make a super simple silhouette pillow! (smile)
Happy Crafting!


This is SOOOO Cute! And your living room looks cozy...as I'm sure you were shooting for :)
ReplyDeleteYour garland looks great on your fireplace. Thanks for the tutorial.
ReplyDeleteLove your old house and the fact that you're restoring it with vintage touches! The nursery is fabulous - all those cute little touches make is so unique! So glad you stopped by and liked my kitchen so I could find and follow you!
ReplyDeleteKelly
This is so adorable! I love how you made the flowers!
ReplyDeleteWe're your newest followers! Please stop by BringingBeauty.blogspot.com and check us out! And we hope you'll join in on our first ever Beautify It Monday Link Party starting this Monday!