
I hope you had a wonderful Easter weekend. Today I'm sharing our kitchen makeover. As usual, I debated on whether or not to share this since in my mind our kitchen isn't quite finished. (I always refer to our house as a "work in progress".) But the fact is it probably will stay like this for a while, because when you have an old house that needs work, it's all about priorities!
The reason I decided to share this is because we actually did this makeover on a budget of $1000. I always feel like paint is the most affordable way to completely make over a room and painting kitchen cabinets are a perfect example. The other ways to affect a remodel on a budget are to be resourceful, use existing elements if possible, prioritize those things you feel are worth the extra money and finally, do the work yourself!
BEFORE:

This is how the kitchen looked when we did a walk-through on the house. Can you believe that I lived with it like this for almost a year? But it was almost exactly a year ago (I was 6 months pregnant at the time) that we were ready to tackle the kitchen!

Believe it or not, we did the majority of the work one Saturday. My daughter spent her first night away from home with her grandma and we worked all day and some of the night. I did all of the painting while Justus took care of trim work, light fixtures, and other time consuming details.
I had never painted cabinets before (in our previous house we purchased new cabinets when remodeling our kitchen) and I was very nervous. But there was really no reason to replace these cabinets. Sure, they were ugly, but these cabinets were as solid as could be, made with thick oak wood.
I visited our local Benjamin Moore store and they helpfully pointed me in the right direction as far as what kind of primer to purchase and a cabinet paint roller. The $6 for the cabinet paint roller was worth every penny! (smile) I originally wanted to use an oil-based primer, but since I was pregnant at the time, we went with latex. I painted one coat of primer and three coats of paint.
AFTER:

I used the same color for the cabinets and walls (Simply White by Benjamin Moore). Since our kitchen is on the small side, I knew white would not only brighten the space, but also make it appear larger.

If you've read about our butcher block countertops, then you know they are something I have always wanted. The warmth of wood looks beautiful with an all white palette. These countertops are my favorite thing in our kitchen. They were made by my husband and father-in-law from 100-year-old reclaimed barn wood (you can read more about them here).

We were fortunate that the countertops were essentially free since my father-in-law had the wood and tools needed to build the countertops on hand. The countertops are an example of being resourceful though... sometimes unique and lovely things can come about when you have to think outside the box.
BEFORE:
BEFORE:

When we purchased our house, the original bead board was covered with foam tiles. Justus and I had no idea what the condition of the bead board would be in when he removed the tiles. He did the laundry room and kitchen at the same time and we were pleasantly surprised that although the bead board was covered in pealing old teal paint and had a few holes, it was in a salvageable condition. This was a very dirty project and Justus did it all himself since I was pregnant and we knew we were potentially dealing with lead-based paint. He shut off this section of the house for a day and wore a face mask when sanding and making repairs. He then added a coat of primer and a coat of paint before opening this section back up. I added three more coats of paint after that to ensure everything was sealed properly and would be for several more years.
AFTER:
AFTER:

By renovating the ceiling, we were able to raise the ceiling height by a good 4". This was a very positive thing since the back portion of our house originally was a porch (before there was such a thing as indoor plumbing) and has a lower ceiling height than the rest of the house. Justus added trim on top of the cabinets for a finished look.

The farmhouse sink is also original to the house and fortunately is in excellent condition. We did replace the faucet and spent about $200 on it I believe. I purchased the cabinet hardware off of Ebay for about 1/3 of the price of what we would have spent somewhere like Lowe's. We also replaced the dishwasher.
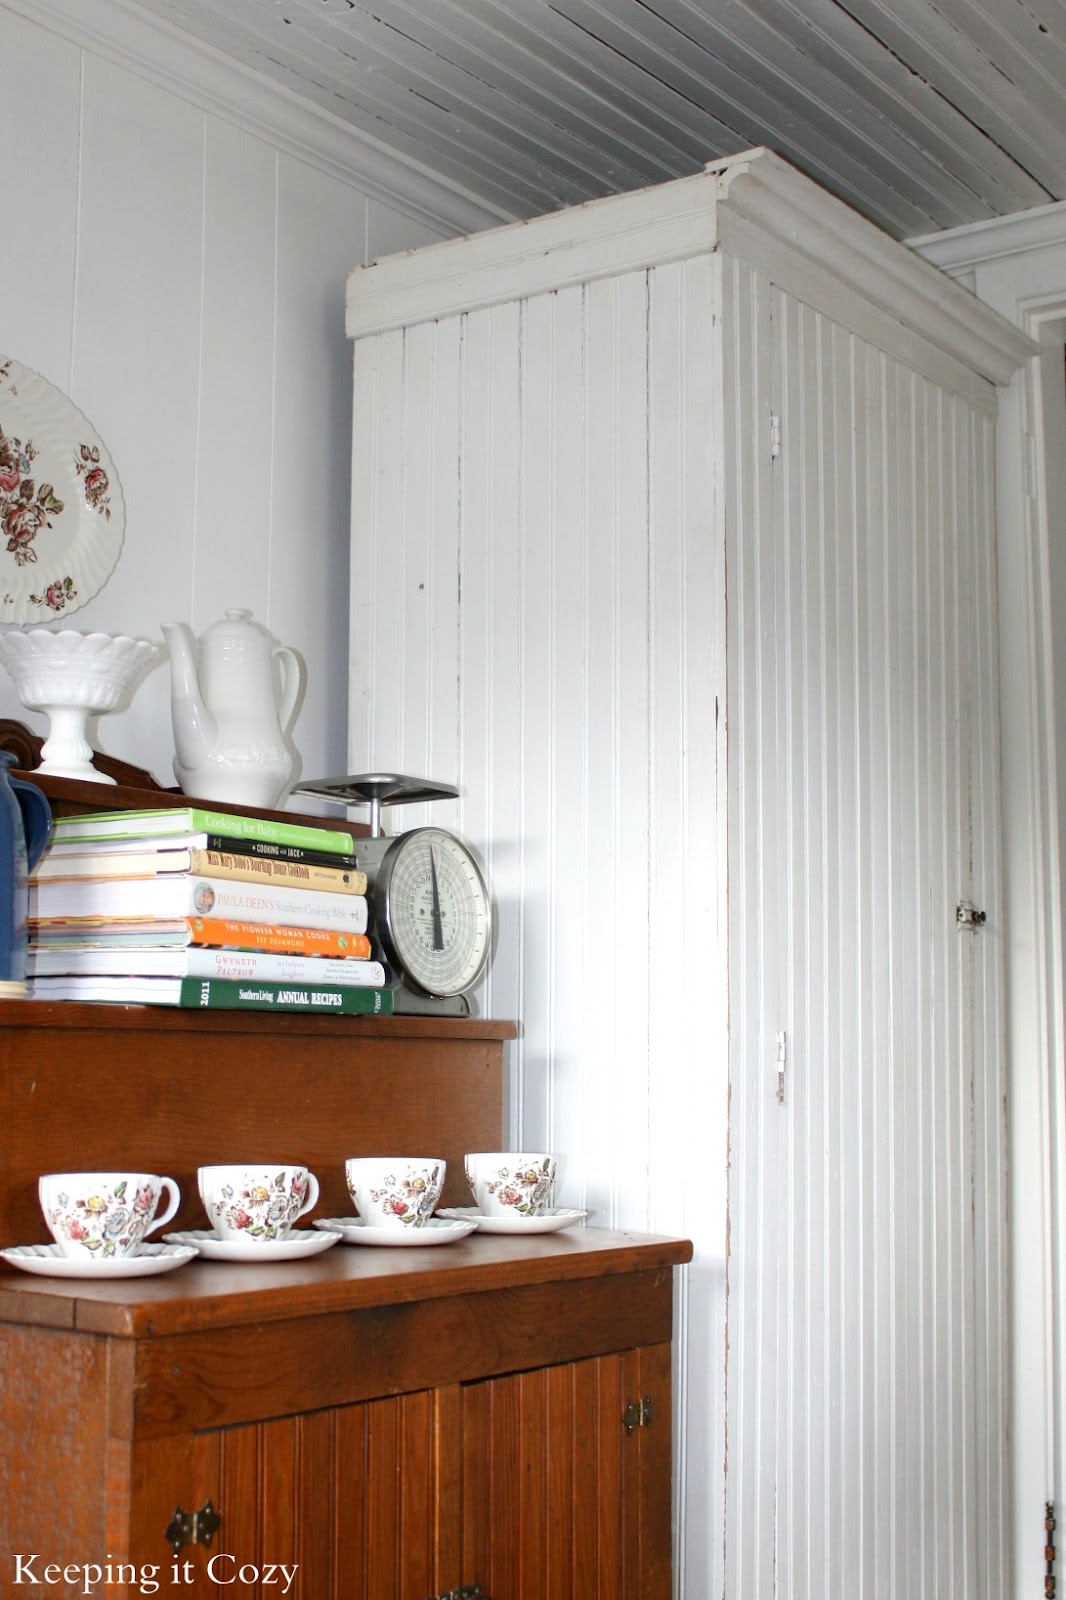
The white bead board cabinet is something I found prior to purchasing our home and I use it for a pantry (you can read more about it here).

Later I purchased this wood piece at a local antiques store and I use it for extra storage since we have a limited number of cabinets. I love both pieces in the kitchen since I feel like they must have been made around the same time period as our house and the bead board gives a cohesive look.
BEFORE:

AFTER:

This view is looking into the laundry room and then a bathroom. Eventually we'll replace the floors in this portion of the house to match the rest of the downstairs. We left the walls as they were because the bead board behind didn't appear to be in good condition from what we could see and although this is a type of paneling, it is solid wood about 1/4" thick. And actually I feel like a little variation from bead board is okay... our entire house is bead board!

I found this farmhouse table for something like $40 and refinished it. We love this old table and even though we're a little crowded, we usually eat our family meals here instead of the dining room.

Some day we'll replace the refrigerator and stove, but for now, these work fine.

Although our kitchen is by no means perfect, it's cheerful, charming and the heart of our home. I don't feel like you have to spend a lot of money to bring about some major improvements. We have some ideas in mind for additional improvements, but with an old house, a budget, and limited time, you learn to prioritize home repair projects and be content until the time is right.
And although I do try to keep our kitchen clean and uncluttered, I have to be honest... I normally have a high chair with an occupant in one corner...

And my refrigerator is always packed with sweet artwork. (smile)

For fun, here is a list of what we purchased for our kitchen makeover with approximate prices:
- Paint $100
- Cabinet Roller $6
- Trim $75
- Faucet $200
- Cabinet Hardware $85
- Light fixtures and covers $150
- Dishwasher $400
UPDATE: To read about our entire kitchen renovation and see more photos, click here.


You did a great job. Awesome ceiling. I love your farmhouse kitchen.
ReplyDeleteHi Andrea,
ReplyDeleteVery cute!!! I love your new farmhouse kitchen! I can't believe that you did all of that so cheaply! It made a huge difference! I also, love that old farmhouse sink! What a treasure! Thanks for sharing!
Kim
You did an awesome job. Wonderfully bright and cheery and so farmhouse. Your kitchen is just perfect. I would love it. The farmhouse sink is to die for and you refreshed the whole room. Wonderful ;-)
ReplyDeleteI think it's awesome that you didn't rip your kitchen apart. Most young couples now want new and sometimes newer isn't better. Your kitchen is beautiful! You've used what you have and made it work on a budget. I love the countertops! Old wood is just the most pristine thing you can find.
ReplyDeleteGretchen
This is really beautiful! Everything looks so fresh and cozy, but I have to say I am loving that bead board ceiling.. Fantastic job! Marcia
ReplyDeleteMY kind of remodel. I can't believe the money people spend on their kitchens. A long time ago I did ours on a budget. Out cabinets are of good quality but not the most attractive. But they are lighter. I scrubbed them down and oiled them. I wanted to change the hardware but the holes wer about 1/4 inch off. (Older home) Finally trying severl place I found one kind from Restortion hardware. I loved them. After all these years I still love my kitchen. I picked out a wallpaper that was French Country and it is still exactly what I want.
ReplyDeleteI love your kitchen. I love that ceiling.
I can't believe what you were able to accomplish on such a tight budget. I like that you kept so many of the original elements and added the new/old countertops. Those countertops are amazing! So happy to find your blog...
ReplyDeleteThis is DIY at it's finest! A modest budget, respect for existing elements and non-professional know how is what it's all about to me. Your sink and ceiling make this room lovely and unique and everything else you have done compliment them. Am I gushing too much? lol ~ Maureen
ReplyDeleteYikes!What a makeover! I am so jealous of your original beadboard ceiling! I would love to have that. I am so glad you were able to salvage it!
ReplyDeleteoh my !!!! LOVE your kitchen....love the ceiling, awesome....love the white cabinets, awesome.......love the white painted everything.......looks like a farm kitchen, cozy, simple, fresh......yes, LOVE it.......also, I am now a new follower!
ReplyDeleteWhat a transformation - and on a tight budget, too! Great job. Love the white cabinets.
ReplyDeleteOh my, what a difference paint can make! Your kitchen looks wonderful...very nice and fresh :)
ReplyDeleteGreat Job! Love the bead board. We built our house 6 yrs ago and that is one thing we added just to make our house look old. REALLY LOVE that farmhouse sink! and love the baby in the high chair too :) Old houses are the best~
ReplyDeletehttp://betty-southerngrace.blogspot.com/
Absolutely Love your Farmhouse Kitchen!!
ReplyDeleteI have an all White Kitchen as well and love it..
My cabinets are the bead board in white with a vanilla bean glaze and I love it!
You did a fantastic job in reusing and all of your choices..
Congrats and Enjoy!
Fabulous!!! The before and after is increadible, you guys did an amazing job! Thanks for linking, I shared it on FB :)
ReplyDeleteXO
Kristin
Love seeing your work in progress. I have one too. How satisfying to have a project that you were able to tackle and FINISH in a weekend. It turned out just perfect.
ReplyDeleteDenise
This comment has been removed by the author.
ReplyDeleteThis is so beautiful! It's amazing what you did on such a limited budget. You have great taste and the kitchen has so much character. I especially love the bead board ceiling, the counter tops, and the farmhouse sink. GORGEOUS!
ReplyDeleteAngie
Want to join the chorus of those who love your kitchen. It's got such great character, and I love your attitude toward renovation. I hate to see people tear out perfectly good cabinets. And that ceiling, and the sink--so beautiful. It looks like such a cozy, clean space now.
ReplyDeleteWhat a stunning transformation!! I'm in awe ... and a little bit jealous.
ReplyDeleteThanks ~
Mary @ Sea Quilts
I love your kitchen! I can't believe that someone would cover up the beadboard with ceiling tiles! So much better now!
ReplyDeleteThanks for the inspiration!
blessings,
karianne
Your kitchen looks amazing! Bravo, on a job well done!
ReplyDeleteWhat a difference the white makes. I really do like what you all have done, and who would have ever thought that the bead board would be so beautiful...I certainly admire your husband for all his hard work.
ReplyDeleteI know that your are extremely proud of him! I'm thinking that there will be lots of happy hours spent in that kitchen...
hugs
You did a beautiful job on your kitchen! Love your home! We are currently looking at an older home to puchase. Stop by and take a look if you have time.
ReplyDeleteSandy
What a great kitchen remodel. Love all the character and how exciting to find bead board on the ceiling! And your pantry looks like it was built in there ...
ReplyDelete:)
Linda
What a fabulous transformation! All of your white painting really paid off. It is so bright and crisp. Love it!!
ReplyDeleteMary Alice
Love your kitchen! You did a wonderful job of your redo!
ReplyDeleteLove that sink too.
Be a sweetie,
Shelia ;)
Wonderful...I love it.
ReplyDeleteWow! What a beautiful transformation and I love white kitchens and all of the country charm of yours!
ReplyDeleteOMG, I am having serious sink envy! I live in a 100 year old house, and I'd really like a sink like yours. We made some cosmetic changes such as painting the old cabinets and replacing the flooring. Your butcher block counter tops are gorgeous. We have foam tile in our den and we're wondering what's above it. You were so lucky to have the beadboard in your ceiling. Everything looks fabulous and I'm so impressed with your hard work.
ReplyDeleteI could not love that kitchen more if you had spent 50 grand on it! It is so wholesome and charming! I am following you now, cause I love what you do!
ReplyDeleteYour kitchen may not be perfect but that just adds to the charm of it. I really love farmhouses and I love that you used what was there and captured the farmhouse feel perfectly! It's so fresh and pretty ~ your hard work really paid off!!
ReplyDeleteAmazing, that is an incredible transformation! I love the ceiling and what luck to have the beautiful original sink. Visiting from WOW and a new follower.
ReplyDeleteI just LOVE it...what an amazing transformation! Everything looks so crisp and fresh. You have wonderful taste:).
ReplyDelete~Julia
Being that this is our first place where we can change the color on the walls I have been keen on color, but I really really like your white kitchen. I also dig my feet in as it's the same color as my mother-in-law's kitche I suppose. I didn't think so, but humbly it's probably true. *smile* We talk about doing a simple makeover on our kitchen as well. Our home was built in the 70's I think, so we have a wood color. Like you said, it's all about priorities and we need to finish the roof this spring as well as paint on the outside of the home. Goodness, I love living out of town and having a home to call our own, making our own list is fun also. *smile* Have a blessed day and thanks for sharing your kitchen make over. I appriciate it. *smile* Sincerely, Mommy of two little blessings & so much more!
ReplyDeleteYour kitchen looks FABULOUS! I agree white totally brightens and opens up the space! It's PERFECT!!! XO, Aimee
ReplyDeleteI love your white kitchen.. great job - lots of hard work!
ReplyDeleteWhat a transformation....love all the white!
ReplyDeleteOH! I LOVE it! Paint...this is exactly the kind of makeover I love...hard work...and make the best of what you have...that beadboard is to die for:)
ReplyDeleteNow, I'm going to go check out the rest of your home!
Rene'
Your room is gorgeous! I love the beautiful simplicity of it all. That mirror is a perfect compliment to the whole room.
ReplyDeleteY'all have done an incredible job making it into perfection!
LOve Love the sink , and the beadboard on the ceiling...Your a lucky girl...Your newest follower...Follow back if you like...Blessings Lori
ReplyDeleteYou did a wonderful job! You kept the best parts and made the bad parts beautiful. I am inspired and amazed. Thanks for sharing your makeover!
ReplyDeleteWow! You turned a very dark and dated kitchen into a charming, beautiful farmhouse one! I love all the beadboard an how the white paint just opened it all up. It's like the room can breath now. Fantastic job! I'm visiting from the Shabby Nest.
ReplyDeleteHave a lovely weekend!
Deborah
This is wonderful. You have my dream kitchen. What a special place you have! Great work.
ReplyDeleteoh yea, and I'm a happy new follower! I am your 103rd. That is exactly how many followers I have.:)
ReplyDeleteYour simply white kitchen is simply beautiful!! Very inspiring. I'm your newest follower :)
ReplyDeleteThe transformation is simply AMAZING; the kitchen is beautiful!!
ReplyDeleteNancy
Lovely!
ReplyDelete...Your kitchen is amazing!! Great job!
Visiting from Feathered Nest Friday :)
Greetings from Australia♥
~Pernilla
Wow, what a pile of work that must have been! But it looks amazing, and I love everything you did! Beautiful!
ReplyDeleteLeanne @ http://www.becauseithinkican.com
Great kitchen re-do. Pulling off the tile ceiling and painting out the bead board ceiling makes such a beautiful difference. I would love to find a large cabinet like yours to use for a pantry. What a terrific find!
ReplyDeleteI love your cozy white kitchen! Excellent choices in materials. First time visitor, and I'll be back. :)
ReplyDelete-Revi
Wow your kitchen is looking amazing! I love the wooden counter tops- you guys have done some great work. It does always feel like our home is a work in progress too. It feels great to look back on all the work you've done though. If you have some time I'd love it if you'd stop by my blog and check out the giveaway I'm having for Ramsign House Number Signs!
ReplyDeleteWow! Your hard work has paid off big-time! It couldn't be more fresh and inviting! Wonderful job!
ReplyDeleteYour kitchn is absolutely beautiful & so charming!! I am your newest follower :)
ReplyDeleteIt's so refreshing to see a true "cottage" kitchen renovation that didn't break the bank. It's nice that you kept the charming beadboard and salvaged your solidly built cabinets. Your vintage furniture pieces are the cherry on top. Bravo!
ReplyDeleteSuch a wonderful transformation! You're turning your house into such a charming home. (Newest follower.)
ReplyDeleteDid you sand your cabinets before you painted them? we are planning to paint our kitchen cabinets but have been told many times that it is a very long and tedious process due to all the cleaning and sanding you have to do prior to painting.
ReplyDeleteHi Melissa,
DeleteYes, we did lightly sand our cabinets before painting, but we really only sanded off enough to remove the varnish. Then we used Kilz primer before painting. It was a long weekend but the results are worth it!
Hard to believe it's the same kitchen! I love the handles you've used. I can't wait to look around your blog and see the rest of your house :)
ReplyDeleteBeautiful renovation. What a difference! After you renovated the ceiling was there a gap btwn the cabinets and the ceiling? Does the new crown molding hide the gap?
ReplyDeleteYes, exactly! The crown molding hides the gap and gives a more finished look. Thanks for visiting.
DeleteGreat kitchen and inspiration for our upcoming kitchen update!
ReplyDeletebeautiful job. i am in the process of painting a lot of knotty pine and beadboard in my own home so i know what a pain it can be to do. might i recommend a stripe of caulk where the ceiling meets the walls and cabinets? i think it would really finish off the job!
ReplyDeleteSuch a wonderful transformation - the short amount of time in which you made all these changes is simply amazing. I just had one question - did you replace your refrigerator as well in this remodeling process?
ReplyDeleteI wish, but no, we have the same refrigerator we've had for the past 8 years! I'm hoping it will stop working one of these days so I have an excuse to go buy a white one to match our dishwasher! :-)
Deletethis has given me the push I needed to go ahead with my cabinet makeover. I too have the kitchen cabinets that came with the house, but I've had to live&cook with them for 6 years now and I think it's time to give them a new face. I have a question: did you have to sand of the varnish your old cabinets had to be able to paint over it? Mine are also solid wood and it does make me a bit nervous to ruin them by experimenting...I'd really appreciate all the tips you can give me! Thanks, Alexandra
ReplyDeleteHi Alexandra,
DeleteWe did sand our cabinets lightly to remove the varnish and then used Kilz primer before painting the white. I was nervous as well, but it went smoothly and so far they have held up quite well. Good luck!
Now THIS is a livable real life kitchen! I have always wanted a white kitchen with butcher block counters and this embodies the picture I've had in my mind! Are the fridge and stove in the before shots the previous owner's? They look different from the ones you have now, especially the fridge which looks to be SS now. The stove in the before shot looks like a beige-y color while in the after it's white. I love your kitchen now!
ReplyDeleteThank you for your sweet comment. The fridge came with us from our previous home and the stove was replaced by the owners before we moved in. That was a very pleasant surprise!
DeleteIts an amazing difference. About 3 years ago I did very similar paint and countertop re-do to my 1970's kitchen. The cabinets are the originals from 1951. I painted all white cabinets and installed nickel hardware - but I went with a black countertop. :)
ReplyDeleteI love your bead board ceiling - the one thing I might have done differently was to paint that a beautiful shade of blue (similar to what it was).
I love to see before and afters, especially kitchens. You did an awesome job and I like how quickly you did it too!
ReplyDeleteNice work. It looks great.
ReplyDeleteYou mentioned that you used Benjamin Moore Simply White... did you use the same sheen on all components (cabinets, trim, wall, ceiling, etc), or did you change between elements? Which sheen(s) did you use (matte, eggshell, semi-gloss...)?
Thank you. We used eggshell on the walls and semi-gloss on the cabinets.
DeleteBeautiful! It's only calling out to my desire to live in a farmhouse style home even more. Great work!
ReplyDeleteThis comment has been removed by the author.
ReplyDeleteHi,
ReplyDeleteI would really love to have more information on how your husband sanded the ceiling. We have a 300 year-old holiday house that has just one bedroom with two walls of it and my husband has spent hours hand-scraping the layers of paint off of it (yes, he's a perfectionist) and three years later (we don't go often) we are still working on it (I had cancer when we started so couldn't do much). We've tried with a power sander or whatever they're called but it just doesn't seem to do the trick. I'd love to know how to do it ONE DAY! Perhaps I could convince my husband that he, too, could do it ONE DAY. :-)) Can you tell he's driving me crazy with this stupid room. We are stuck there!
Hi there! He used a power sander just enough to sand off the flaky, loose paint and then we simply painted over the rest (several coats). Sounds like you have a beautiful holiday house! Good luck and hope you are healthy and well now!
DeleteThanks! Guess who's going to read this post? And take a look at the imperfections in between the slats! :-)) I must convince him to move on!
DeleteYes, I'm healthy and well now, four years out! Waiting for the big five year point! Thank you so much for asking.
AMAZING! You guys did a truly beautiful job! and to do it on a $1,000 budget makes it even more great! You should def. be proud! It's lovely and inspiring! We have a to long - to do list and we have budgets for it all! I think when one has a budget it makes it more challenging but lots of fun too!
ReplyDeleteJust found your wonderful blog through one that I read. Wonderful find... I Love your style from the fabric on your pillows to the white you use throughout your home. I would love to paint our wood floors but am nervous about the dog scratching the paint. Is that possible? May I ask where you purchase your fabric since I love the style? Your girls are beautiful and your photography skills are great. Know that I am now a follower and look forward to your posts and pictures.
ReplyDeleteI think it’s great that you shared this kitchen makeover! This can definitely be a good inspiration for homeowners who want to makeover their kitchen as well. I noticed the big changes that you’ve made aside from the paint. You removed some of the items around the kitchen to make it look uncluttered and spacious. It’s also a good idea that you removed the mini-curtain so that natural light can easily get in and brighten up the space. I like the new look. It’s vibrant, fresh, and very clean.
ReplyDeleteWow! That was a great transformation. I like your idea in changing the look of your kitchen and it comes out fantastic. You did an amazing job. Thank you for sharing.
ReplyDeleteLove your kitchen! Did you have to remove the stain from the cabinets before you painted them?
ReplyDeleteAmazing that you guys have had the perseverance to turn your home into something so beautiful...I know how stressful those home improvement projects get!!
ReplyDeletelove the minimalistic reno job, it gives a nice layering of history to a house
ReplyDeleteso so so so awesome!!! love love love the bright SHINY white!! CEILING LOVE! and conveying your sink/drainboard
ReplyDeleteHello Andrea, This is the very first time that I ever read a BLOG & I'm glad it was yours. You remind me of myself when I was your age :)
ReplyDeleteI'm starting a internet blog directory and was wanting to know if I can submit your blog? I'm hoping to mature my directory
ReplyDeletegradually by hand so that it retains top quality.
I will make sure and put your website in the appropriate category and I'll also use, "Blogger: Keeping It Cozy" as your anchor text. Please make sure to let me know if this is acceptable with you by e-mailing me at: sterling_crenshaw@gmail.com. Thanks!
My web page ... home improvement contractors
I love your blog my husband and I bought an older home from the 1920's mainly because it was in our price budget at the time we were 23 with a two year old but I have always loved character homes my husband though not so much the character work that comes with an older home. I have been wanting to paint the kitchen cupboards since we first moved in 16 years ago (and two more children added) it just seems over whelming but seeing your pics makes me want to dive right in!! You have a lovely family thanks for sharing your projects!
ReplyDeleteI know the last post was over a year ago, so hopefully I can still reach out to you!
ReplyDeleteI have been searching EVERYWHERE on the net to find a set up like yours. By this, I am meaning the old double basin sink with the dishwasher partway covered by the sink and the rest with a wooden counter top! I was curious to see the final look. We are redoing our kitchen and want to incorporate vintage items (dishwasher is from this era though) ;p Now my question to you would be how is your wooden top that is exposed to the heat/steam from the dishwasher holding up now that it has been exposed to these elements for the past few years? Did it warp, separate, discolor... any changes at all? My hubby works with wood, so we were considering wooden counter tops such as yours but concerned about the moisture/heat exposure. Also with your wooden tops, how are they finished? Spar varnish, resin, etc...? I didn't catch that info in your blog if I overlooked it. (My apologies if so, was just excited to find someone with what I had pictured in my head) ;p Thanks and hope to hear from you soon!
Hi BJ,
DeleteSo glad this post is helpful to you! I am happy to say that after several years, the countertop has help up great being exposed to the dishwasher steam and heat! No warping, separation, discoloration at all. I would just be sure you seal them really good. I've used a variety of products in the past from Behlen Salad Bowl Finish to Rustoleum ButcherBlock Sealer, but this time around I'll be using tung oil. :-) You can read more here: http://keepingitcozy.blogspot.com/2013/08/all-about-butcher-block-countertops.html
Beautiful, thank you for your reply!! Glad to hear that it has held up well, so it is good to know that it is possible. Thank you for the tips and the link! <3
Delete