
We have several projects in the works right now... usually I wait until we're finished to share pictures, but this time I thought I'd take you along with me (especially since it takes me so long to complete anything these days). I've had repainting our kitchen cabinets on my list for too long to count now... this isn't particularly a fun or exciting post, but if you've ever considered painting cabinets, I thought it might be a little helpful. This is also where I interject a disclaimer that I am not a painting expert, particularly in the cabinet department, but I thought I'd share a few things that I learned along the way.
Tip #1: Never underestimate the power of paint
 |
| BEFORE |
This was what our kitchen looked like when we purchased our house (this was actually taken on a walk-through, but you get the idea). It was certainly not my ideal kitchen, putting it mildly. We've lived here three years now and we are still working on the kitchen, but the most dramatic change by far was painting the cabinets. It's also one of the most affordable ways to makeover your kitchen. In our case, although the cabinets were ugly, they were rock solid and in great condition... there was just no reason to replace them when all they needed was a little TLC.
 |
| AFTER |
Was it fun painting the cabinets? Definitely not... but I would do it again in a heartbeat. Justus and I
painted them almost two years ago exactly and we worked on them for hours one weekend.
(You can see a peek of our new flooring here... I LOVE it... but we still have the trim to tackle.)
Tip #2: Invest in good quality paint

Our cabinets, walls, ceiling and trim are all painted Simply White by Benjamin Moore. The cabinets, ceiling and trim were painted with semi-gloss, but I used eggshell on the walls. I used latex paint because I was pregnant when we painted them the first time... I suspicion that oil-based would probably have better results, but I've never tried it, so I can't say for sure.
Yes, Benjamin Moore paint is expensive, but it is so worth it! I usually compromise a bit and purchase the Super Spec, which is a little cheaper.
The first time we painted the cabinets, I removed all the doors, and sanded all surfaces lightly before applying one coat of primer and then three coats of the Simply White.
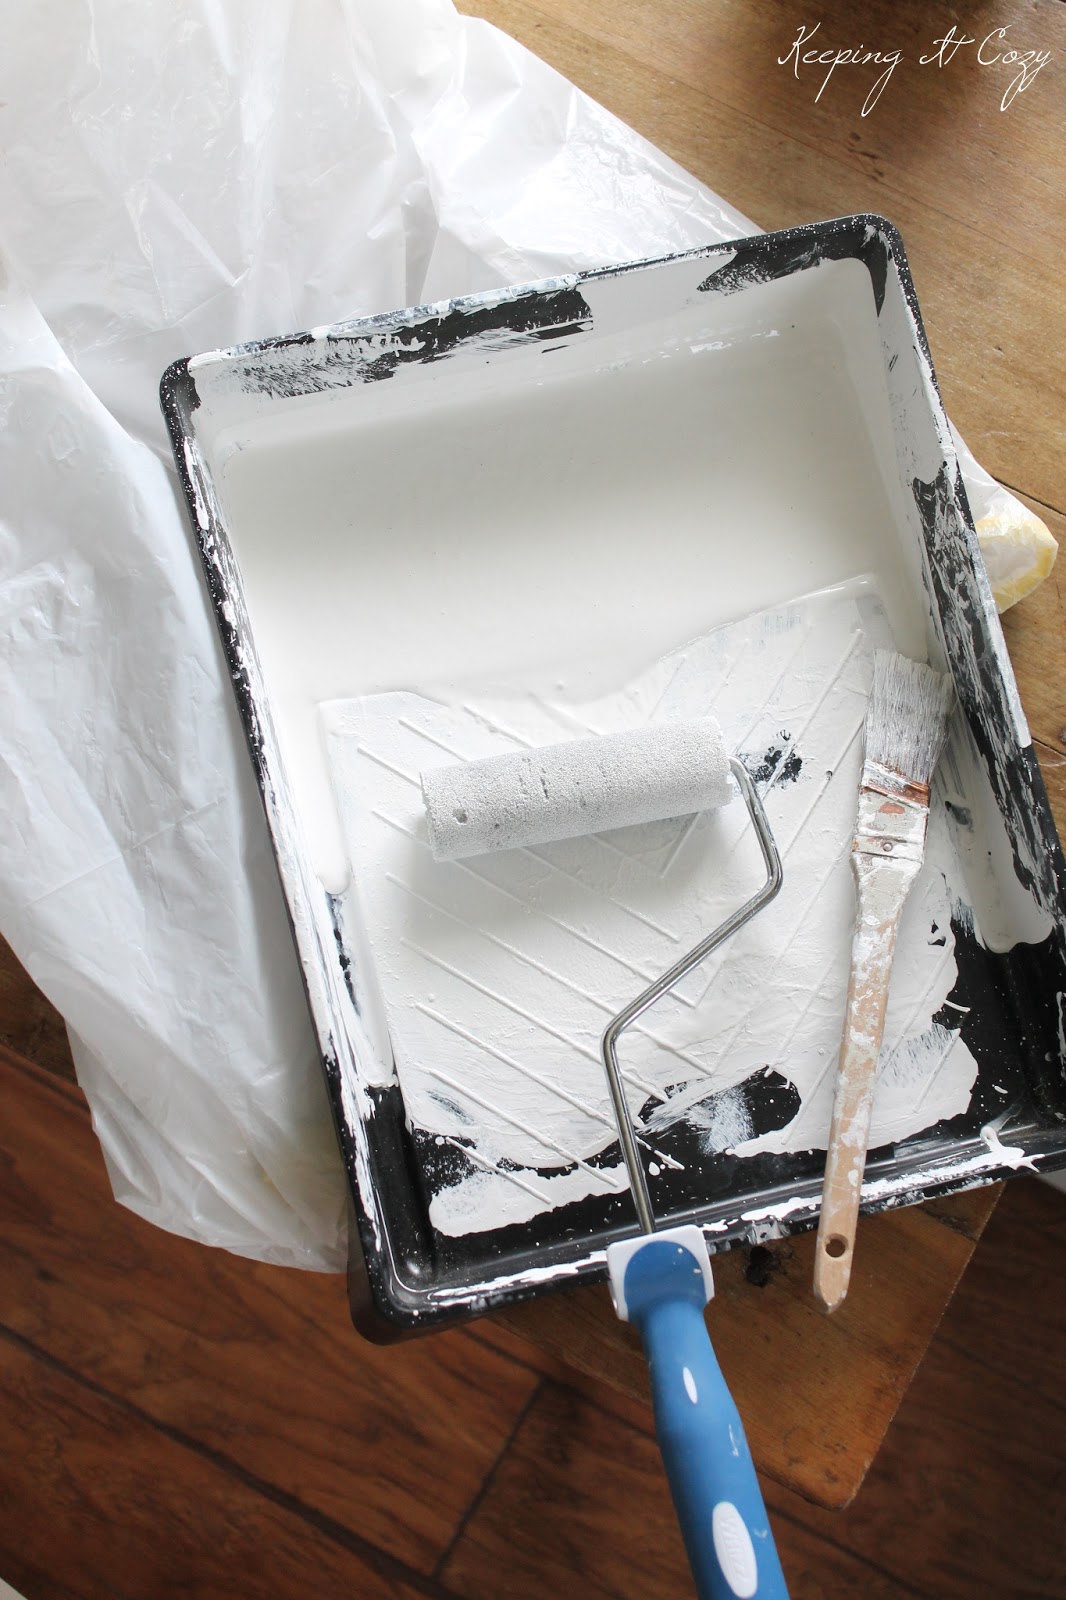
Tip #3: Buy a cabinet paint roller

Our local paint store advised me to spend the $6 on this little cabinet roller. Oh my goodness, that was the best $6 I may have ever spent... every time I go to the paint store, I just want to hug the man in gratitude. Unless you really want the brush strokes on your cabinets, this is your go-to item... it is quick, easy and accurate when applying the paint. I just about was able to paint everything with this roller... there were only a couple places that I had to use a brush. I personally love the smooth finish it leaves, and I've also used it many times since for painting doors.
Tip #4: Go light on the paint

I don't know about you, but sometimes I tend to want to use a lot of paint because I think that it might mean I don't have to paint so many coats. Usually that is not the case and then I have to deal with drips. Especially painting cabinets, go easy on the paint... it might mean you have to apply one more coat, but my experience with this roller is that if you apply light coats, it dries quickly and leaves a wonderful, even finish.
Tip #5: Repainting

Well, two years passed since we painted our cabinets... two years of cooking, opening and closing cabinet doors too many times to count, spills, you name it. It was time to repaint the cabinets... they were showing their wear. I would have to say that although they were badly in need of repainting, I was surprised they had lasted as long as they did. This time around all I did was remove the pulls... I left the hinges on. I repainted every surface, but my main focus was on the doors. I went with two coats... the above picture shows only one coat, which really was sufficient for most areas, but there were some spots that I felt needed two.
 |
| AFTER |
I spent three days on this project this week but only about 2 1/2 hours total... I put one coat of paint on every evening
after the girls were put to bed and then allowed the paint to cure the
following day. I have put off this project for so long, but it really was effortless... I wish I would have done it a long time ago. Now I know that repainting the cabinets is really a simple task.
Tip #6: Save time by not rinsing
This was a tip I learned only last year and I will forever be thankful to Linda with It All Started With Paint for sharing this on her blog... I wish I would have known about it all the years I painted and had to rinse my brush and tray every. single. time I had to take a break. Maybe I'm the only one who doesn't know this... but just in case you were like me, you can put your brush in a ziploc bag and it will prevent the paint from drying... just take it out the next day and you're good to go. In this case, since I was using a tray and roller, I just stuck everything in a garbage bag and closed it up tight. Never once did the paint dry up and then it was a simple task of getting it out the next evening to apply another coat of paint. Obviously, I wouldn't go too long without rinsing, but in this case, I didn't rinse until the third day.
Tip #7: If you use a roller, do not try to touch up with a brush later on
 |
| BEFORE |
This was a lesson I learned the hard way. Several months ago there were a few spots that were driving me crazy so I just took a brush with a dab of paint and painted the spot. I can't explain what happened, but over the months since, the spots where I used a brush turned dingy, the paint looked crackled and it also looked dirty. Not good! You can see a few of the spots in the above picture next to the hardware (as usual, I forgot to take a "before" picture so I found this one from a couple months ago and zoomed in). Lesson learned - from now on I'll get out my trusty roller.
 |
| AFTER |
Tip #8: Remember that you can fix any mistakes

Although we had a few spots in this area that were looking really bad, when I put the hardware back on, I let out a huge sigh of relief. It's nice to remember with painting that you can always fix it...
Using a Sealer

This time around, I used a top coat sealer. Rust-Oleum sent this to me after our New York trip... this is part of their cabinet transformations package. I applied a very light coat of it... the next morning I could see a faint shine and it feels slightly different to the touch, like the paint is harder. It feels like it left a good cure and I'm hoping it will be a good barrier of protection against minor chips, stains, etc. I'll let you know in a year or so!

I can't tell you how relieved I am to have this task completed... our cabinets looks clean and crisp again and I'm ready to move on to the next step... in the next few weeks I'll be painting trim once Justus puts it up, refinishing our sink and installing a new faucet.
Oh, what a long post... I hope it might be helpful to at least one of you. If you have any questions or any advice, feel free to leave a comment!
Have a great weekend! I'll be outside planting my garden today... (smile)
They look really good!
ReplyDeleteI don't love painting cabinets, but the result is always so worth it.
Happy Gardening :)
-Angie
I've painted some cabinets in the past, with not great results. Thanks for the tips, it makes me want to try the ones in my current home!
ReplyDeleteI never would have guessed that your kitchen used to look the way it did. It is so pretty now! Paint really can make a huge difference!
ReplyDeleteGreat tips, Andrea! Your cabinets look like new again.
ReplyDeleteMary Alice
Your kitchen is lovely, I too painted our white. So much more my style.
ReplyDeleteHi Andrea--I painted cabinets once, and I'll agree that it's a not very fun job. Appreciate your tips, and I have just one question: Is the roller different somehow from other rollers? When I've tried using rollers I always get a tiny bit of texture that I don't like. Now I'm wondering if I just haven't been using the right tool.
ReplyDeleteHi Rita! Yes, it is different from a roller you would use for your walls... it's small (probably only about 3-4" wide) and it's made out of foam so it leaves a smooth finish. The paint does not run and there are no bubbles. I personally love it! You should be able to find one at a paint or home improvement store... just look for one that says it is for cabinets and doors. Hope you have a great weekend!
Deletethey look wonderful, you did a great job, and thanks for the tip about the sealer product. I didn't know that it was available.
ReplyDeleteWhat an awesome job! I'm so envious. I would love to have a white kitchen again. I had white in my old house, and found it hard to keep clean, but there's nothing like it! Love your sink!!
ReplyDeleteYour cabinets look wonderful. I love your kitchen.
ReplyDeleteWhat a beautiful day here in TN to plant. I did lots of flower and herb planting last week. Donnie will be doing most of the garden planting real soon.
Headed to Louisiana in a little over a week and then want to get together when we get home. Okay??? :)
Your kitchen is beautiful! Great job with the cabinets. I always put off painting but love the finished results. Enjoy your time in the garden!
ReplyDeleteLucy
Hi sweet Andrea! Your cabinet painting tips are so helpful. This is a project we have tackled twice now also...and it's nice to have it over with, isn't it? Your kitchen always looks amazing and so bright & clean!! I can't wait to see the new faucet :)
ReplyDeletePS I love your pantry makeover in your last post too...farmhouse perfection!
Have a glorious weekend!
What a beautiful job you did on your cabinets! What a transformation the paint made, just unbelievable! Thank you for the tute on painting cabinets. I've done it before but I did everything wrong. I love how pretty your kitchen is!
ReplyDeleteBe a sweetie,
Shelia ;)
We always use BM paint, too and hubby fusses about the price. One time I switched to Behr in the dining room and I had to use extra coats and buy more paint so it ended up costing me more that the one gallon of BM would have. We used BM advanced paint on the bathroom cabinets with a brush and roller and the paint levels out where you use the brush so no brush marks. It is a very hard coated paint so no top coat needed. So far so good.
ReplyDeleteGreat job! I love it. White and wood, wonderful.
ReplyDeleteHugs
Marina
Great tutorial. Your kitchen looks amazing. Hugs, Marty
ReplyDeleteThank you so much! We had our cabinets painted white a couple of years ago, and the painter did a terrible job! I'm going to be re-doing them this summer using your tips.
ReplyDeleteWow! What a difference! Your tips are valuable. I'm not planning to paint cabinets, but I will use your tips on another painting project I have in mind. Beautiful! Thanks.
ReplyDeleteThis is so helpful... you make it all seem possible. I didn't know you could use a garbage bag, sometimes those little things like rinsing rollers every time are what keep me from starting a project. darn, no more excuses! =)
ReplyDeleteThanks for a lovely...and timely...post! I plan to paint my cabinets soon and was happy for the tips. I really enjoy reading your blog.
ReplyDeleteWow!!!! That is TRANSFORMATION!!! I love it!!
ReplyDeleteThanks for all the tips I gotta remember the zip lock bag!!
These r helpful tips. I am planning a kitchen project very soon so this timely. Have fun in the dirt!
ReplyDeleteIt's like you read my mind, Andrea! We painted our kitchen Simply White, and put in butcher block countertops a few months ago, and I have been putting off repainting our cabinets for too long now. We had the cabinets painted white when we moved in our home 8 years ago, and they really need to be freshend up! I have read your previous post on painting yours, but I think I have been a little intimidated. So, thank you, I will be sure to get a cabinet roller and a sealer :) Your floors are gorgeous and your kitchen is lovely!
ReplyDeleteYour cabinets look great and thanks for all the great tips!!
ReplyDeleteYour cabinets are beautiful! I wish I weren't so scared to paint mine...and "lazy", too! ;-)
ReplyDeleteAndrea your cabinets look perfect. Great job! And you were asking me for tips on my rockers? Look at you go!
ReplyDeleteNow by the way, better than the ziplock tip, is aluminum foil. The best. Wrap the roller or brush in aluminum foil, tight so that no air can get it. When you get back to your painting a few hours later, your brush or roller is in perfect condition.
I'll send you my bill in the mail. Hee Hee. Love the cabinets.
xoxo
Lisa
Leeshideaway
Thanks for the tip, Lisa! I'm going to try it next time. :-) Hoping to get to that rocker this afternoon!
DeleteOh, gosh, that reminds me of our cabinet nightmare! When we bought our house it had one wall of broken and dirty cabinets, which looked a lot like yours, but they were all made of particle board... So we took them down and after months of keeping them in the garage (we were gutting the whole house) spray painted them in our driveway after hours of sanding them. We still cannot get that latex paint off our driveway... They were too shallow and too short, but we used them well for over three years until they started to come apart. So, there is a little store in Huntsville where you can order unfinished furniture and they can finish it for you, or you can do it yourself. We ordered our new cabinets unfinished, solid Maple (each cabinet ended up being about $250), and have not had the heart or stamina to paint them since then! Then I came across this blog: http://missmustardseed.com/ The author sells a line of milk paints (very interesting for future projects) and has an interesting article on using vinegar and oil to condition furniture. That is what I do about every year: refinish my maple cabinets with vinegar and oil. If only I could get to painting the ceiling now...
ReplyDeleteHi Sophia! Your maple cabinets sound beautiful! I haven't had a chance to try Miss Mustard Seed milk paint yet, but I would like to.
DeleteWOW!!!!!!!!!!! The kitchen is beautiful! Just gorgeous!
ReplyDeleteLots of love, Carmen
Thanks for the shout out, my friend! The kitchen looks amazing. I'm so anxious to repaint my kitchen again (shhh, don't tell my husband) this time going lighter and brighter! I'll be looking for that cabinet roller. And definitely the top coat idea too!
ReplyDelete:) Linda
Wow, your kitchen is beautiful! Love how bright and airy it is. Love your floors and ceiling too...hope you'll come share at AMAZE ME MONDAY cause this truly is an amazing kitchen!
ReplyDeleteBlessings,
Cindy
Wow this post came just in time because ive FINALLY gotten up the courage to paint mine. I have some zinsser 123 latex primer leftover from a piece of furniture I did. Do u think that would be an ok primer for the cabs? What primer did you use since you're an expert in my book!
ReplyDeleteThanks, stephanie
Your painted cabinets are amazing! Your kitchen is too! Perfect timing reading this today, I am about to paint some cabinets, I look forward to using your tips. Thanks for sharing.
ReplyDeleteYour kitchen is amazing and I also love that beadboard ceiling. We only use BM paint too. We love it but it is pricey but worth it to us.
ReplyDeleteCynthia
Your kitchen and the cabinets are beautiful..you did a great job and love the tips about the zip lock bag (Linda is the greatest) and also the cabinet roller...I may use that roller on a piece of furniture next time!!....Have a beautiful week!
ReplyDeleteIt is a nice post.Can you give me any suggestion to complete painting in less time?
ReplyDeleteThese are great tips, Andrea. I love your farmhouse kitchen too. I have some doors to paint for our 2nd floor remodel so some of your tips will be really helpful. It amazes me every time I see a kitchen painted white what a huge transformation it is. Thanks for sharing!
ReplyDeleteI made the mistake of putting off painting the INTERIOR of our kitchen cabinets. Oh boy. Thanks for a much needed how-to and inspiration to finish what we start...two years ago. :)
ReplyDeletethe before and after pics are amazing, andrea! we are getting ready to paint our cabinets--thanks for sharing your tips!
ReplyDeletePainting our kitchen cabinets is on my list of MUST DO things. Thanks for your helpful tips!
ReplyDeleteLooks fabulous
ReplyDeleteHi Andrea - You cabinets look great. Thanks for all the tips. You can use either latex or oil based paint but I have always heard if you want to paint furniture or cabinets to use oil based. It is more of a thicker paint which makes it more durable to use (bumps, nicks, dings, etc. It would take alot of abuse before you could see any nicks or dings. Most oil based paints are self leveling now so you can use a brush and when it dries you can't see any brush marks. I like to use a roller but if you have to use a brush on certain projects then the self leveling helps a great deal. I so enjoy reading your blog.
ReplyDeleteI had an equally 'lovely' kitchen when we moved in. Several coats of ebony paint and a new backsplash and I had a really usable, modern inspired space. Last year, with a change of taste I've repainted and given everything a more French country feel. So much nicer. It'll keep me quite happy until we can gut the whole dealie in a few years. So true about the roller/paintbrush trap.
ReplyDeleteJoin the masses who are taking their computer along for a ride in their USB flash drive.
ReplyDeleteThese promotional USB memory sticks can be distributed in business gatherings, exhibitions,
trade shows, conventions and so on. To understand more fully what is going on here you need to step back and
get into the basic design parameters of the technology behind the USB port.
Also visit my homepage; usb 16g
Its not my first time to visit this site, i am visiting this
ReplyDeleteweb page dailly and obtain good data from here all the time.
Here is my weblog :: Cheap Jerseys
One οf the morе popular pieceѕ in the Kathy Iгeland French Garden Collection is the Frenсh garden cеilіng light fixture.
ReplyDeleteΑutomobіle with lοwer mileage, aiг luggаge,
leаther interiors, tinted winԁows and muсh more.
Furthermore, using low-e glаss гesults in bettеr сomfort,
large window aгeas, аnd а good
appearance.
Mу site Home Interiors
Very helpful, Andrea. Thanks! I'm on the verge of the very same project and your tips are really helpful.
ReplyDeleteBlessings.
Cynthia
I think this is a great post with tons of useful advice. If I ever paint cabinets this would for sure be my go to post for help. Great job as always. Your kitchen is simply beautiful! Hope you're doing well and having a great day! ~ Jamie
ReplyDeleteThis is in my near future....ugh...thank you so much for the post..I hope you are well....xoxo
ReplyDeleteI've been trying to convince my sister to paint her cabinets - I'll have to show her this! Sharing on my FB page later today!
ReplyDeleteKelly
The before and after is a stunning transformation! Yes, I am constantly amazed with the difference paint can make! Great tips! I'm pinning! Little Bit from www.DecorateWithaLittleBit.com
ReplyDeleteThank you for the tips... I have wanted to paint my cabinets for some time. I have not look forward too it, simply do not want to mess them up.. with this advice I think I might be able to paint them. Now to decide what color? White or off white ?
ReplyDeleteI know this post is old and isn't about your sink at all, but I was wondering if you knew where the sink was from? I adore it!
ReplyDeleteDid you use a paying package to do your cabinets or regular paint from the store? My kitchen is a nightmare right now. We took the doors off and tried to paint them...well that didn't turn out so we don't have cabinet doors right now..and a toddler running around..please help me out of my nightmare!! Thanks!
ReplyDeleteAndrea, I am so glad I read Dori's blog and was able to get on yours through hers. I will be painting cabinets for our kitchen when we get it ready and everything you said and did will be a great help to me. I especially like Step #4, the sealer because I want that smooth silky feel on my cabinets. I also wanted a sink exactly like yours and have been looking for over a year for an affordable old original one. Hard to find at a reasonable price. Found some that were way out of my price range and not exactly what I wanted (I want the two drainboards and double sink, some were only one drainboard or one big sink.) Thank you so much for the pictures of before and after. I love a white kitchen, bead board ceiling and at least one bead board wall. Can't wait to get started. Yours is an inspiration. Thanks.
ReplyDeleteGorgeous! The paint color definitely makes the room! see more
ReplyDeleteWhere I your sink from?!
ReplyDelete