Tuesday, January 27, 2015

Upstairs Bathroom Design and Dilemmas

The upstairs bathroom project is slowly but surely moving along.  Suddenly we were/are at the stage where everything needed to be picked out and purchased.  Since our plan of adding on an upstairs bathroom, I've had a very clear idea of what I wanted the room to look like, but many things changed as tends to happens in renovations!  So many different options, and yet adding on like we are, we had to take many different things into account; for example, choosing the shape of the shower depending on where the drain was located (due to existing floor joists)!  Fortunately, the only item we haven't made a choice on yet is the floor tile, but everything else is either sitting waiting to be used or on its way.  

 Here's a look at some inspiration photos, as well as items we've purchased.  Because there isn't any natural light in the room, I wanted to keep everything light and fresh, which means plenty of white!  The shower tile will be white subway with gray grout (the same as our downstairs bathroom, which I haven't shown you yet) with glass doors.  We have the barn door hardware sitting in our dining room - it's matte black, but the door design will be similar to the inspiration photo above.  I haven't decided whether to paint it white or a color.  All the fixtures will be brushed nickel.  Although I had envisioned a schoolhouse light in the bathroom, we couldn't accommodate its size on the ceiling, so instead had to go with a flush-mount.  But, I was so excited when I found the perfect location for a wall sconce and happily Justus wired for it after the fact.  ;-) 


Originally I had planned on a two leg pedestal sink, but my practical side won when Justus mentioned two girls growing up in a small bathroom with no place to store or set anything.  I then searched and searched trying to find a vanity that was wood, in our budget, and small in width.  I'm so happy my practical side did kick in, because I love the vanity we ordered.  The gray will help ground the white and I love its pretty, country design!


 The little nook next to the chimney is where the wall sconce will hang.  I think it will help lighten this corner.  Anybody have any idea on the best way to clean brick? 


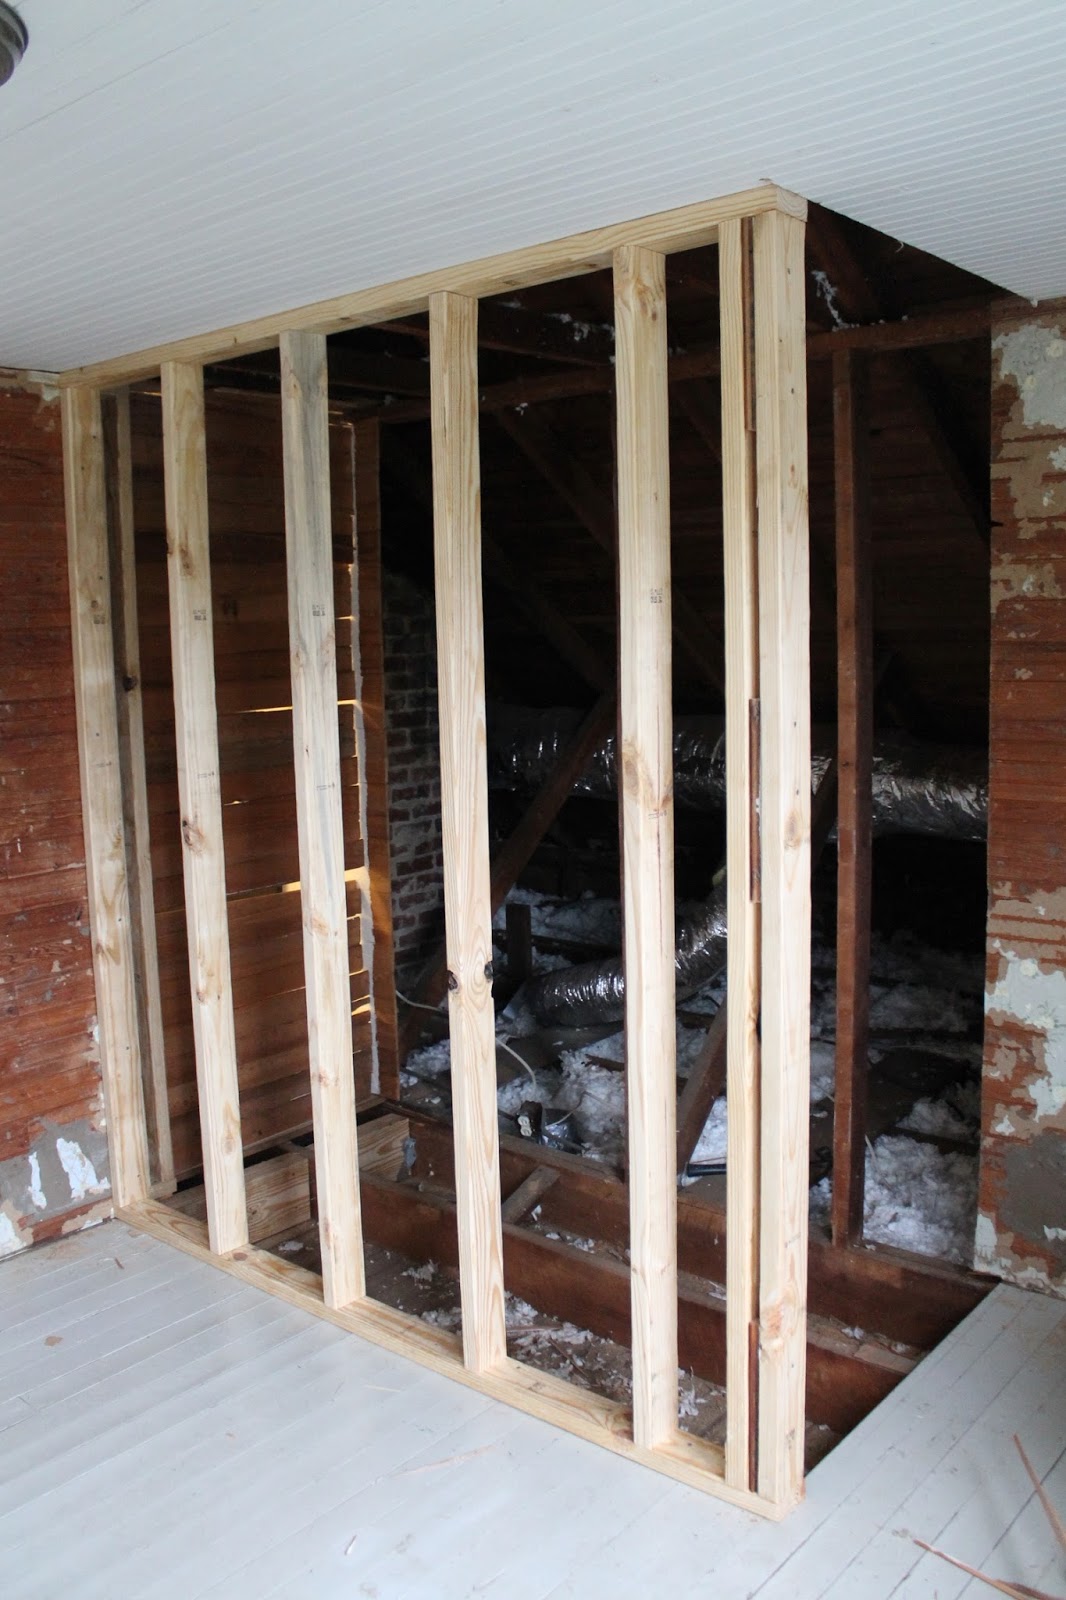
While it may not seem like much has changed since I last posted, the framing, electrical and plumbing are complete and sub flooring has been installed.  Those were all major milestones in this project!  Still much to do, but now comes the fun part - putting the room together!  


 And actually, since the photo above, the insulation has been installed around the walls.  Hard to believe the next item is putting up walls (white beadboard)!

 
Poor Justus.  As you can see, this is how he spends each evening when he gets home from work!
Here's our last dilemma: floor tile.  We both like these choices: whitewash wood look tile and a white mosaic tile (likely with gray grout to match the shower wall tile).  However, we can't seem to make a decision.  I think the mosaic is more period appropriate; however, neither of us relish the idea of putting in the grout and maintaining it.  Does anybody have the mosaic tile, and if so, what are your thoughts or recommendations? 

Hope everything is well with you all!  Thanks for reading and for your help!


Tuesday, January 13, 2015

Baked Sweet Potato Fries


 True, once upon a time I published a recipe for baked sweet potato fries here.  But I really felt like these deserved a post all on their own... a slightly different variation, these are my absolute favorite vegetable side right now.  I've been making these at least once a week this winter and my entire family loves them.  In fact, this is the only way my husband will eat sweet potatoes!  They work great as a side dish and also as a satisfying snack.


 The hardest part about this recipe is the slicing.  Which means they are a cinch to make!  While I really love the small sweet potatoes for baking whole, the large work great for the fries because you don't have to peel as many potatoes.  Once you get a little assembly line going, you'll have the sticks sliced in no time.  In this case, the thinner the better too! 


  This recipe is for 3 large sweet potatoes, which is about 12 cups.  I know, that's a lot of sweet potatoes!  This amount feeds about 4-5 adults and I promise there will not be one left.  If you have a smaller family, you can easily cut the recipe in half. 


 I think the best part about these fries is the mixture that coats them: 3 Tbsp each of extra virgin olive oil, maple syrup and Dijon mustard.  So much flavor.  (Recipe adapted from My Father's Daughter cookbook.)


 Coat the fries evenly with the mixture (using your hands or a large spoon) and spread them into a pan for baking.


 Trust me on this one, place parchment paper in your baking pan first!  It not only makes clean up easier, but also helps when turning the fries.  Now place them into a 425 degree preheated oven and bake for about 30-40 minutes.  You will want to shake the pan every now and then or use a spoon to stir them around so they bake evenly and don't burn.  Also, watch them closely towards the end! 


 The fries are ready when they are slightly browned and crisp on the outside and tender on the inside. If you like your fries extra crispy, turn your broiler on and broil them for a few minutes, watching them closely to ensure they don't burn!  (This is how my family loves them!)   

(Note: I baked mine for 40 minutes and then broiled them for 3 minutes, stirring frequently.  However, cooking time and your preferences will vary so keep a close eye on the potatoes as they cook!)

New! I tried to do a printable recipe for you ... just click photo below to print.   

https://drive.google.com/file/d/0B9wsOJy-0yhNOFBJeWl0SFI5dzQ/view?usp=sharing

Tuesday, January 6, 2015

New Year Construction

I hope you had a happy holiday season!  We had a wonderful Christmas.  The majority of our holiday was spent with family and friends, some that we don't get to see very often.  It was so nice, and yet also very busy, and sadly I didn't take any photos (if you can believe that)!  

The last of our company left on New Year's Day, and as Justus had a four day weekend, he didn't waste any time getting started on our upstairs bathroom project!  So I may not have any Christmas photos to share, but I do have some very ugly demo photos.  ;-)


 We've had this project on our to-do list for a couple years now, but it kept getting pushed back because it's a massive project and basically puts our upstairs out of commission for at least a couple months.  As usual, we'll be doing the work ourselves, although my dad is helping with the beginning stages (he's an Engineer and also has plumbing and electrical knowledge/experience), which helps tremendously.

The bathroom location involves about 3.5' into one of the upstairs bedrooms and another 3.5' or so into the eaves, so some of the ceiling will be slanted.  This was the best location, not only because of great access to the eaves, but also because it sits just about above the downstairs bathroom, which will obviously help when it comes to plumbing.   

In the photo above, the wood floors were cut out  and the wood paneling previous owners had put up was removed to reveal the original bead board.  (Oh look, more wallpaper to remove!) 


 There was quite a bit of discussion planning this past weekend.  (And a lot of laughter too... particularly when I was attempting to take a nap downstairs and there was some very loud hammering going on... not that I was complaining!) 


 The ceiling was cut out and the framing was started... this is the next step before plumbing.  I was pleasantly surprised to see how roomy the bathroom will be, as I had envisioned a room much smaller.  There will only be a shower, and it will be located in the corner closest to me here.  Fortunately, the bedrooms in our house are quite spacious, so this bedroom will still be a fairly good size, even after cutting into it like this. 


 And here's where we are now with the framing close to being finished. 


 We're planning to expose the chimney in the bathroom wall... I love the old brick.  This also provides a little corner for some storage. 


 We'll be exposing part of the ceiling (the slanted area in the eaves).  Unfortunately, we won't be able to expose the beams in the other half, as they were not anywhere close to being level. I imagine I'll leave the beams in their natural state (after prettying them up, of course) and paint the wood in between.  The walls will all be bead board painted white to match the rest of the upstairs. 


Look at this wood - isn't it gorgeous?! 


The door into the bathroom will be here on this wall, and it will be a barn door on a track (fun!).  Right now I'm busy trying to pick everything out, from shower doors to a sink, as we need to get it all ordered.  It's so exciting!  I can hardly imagine how nice it will be to have a bathroom upstairs.  Along the way (after the bathroom has a floor and walls - ha), I'll be removing wallpaper in the bedroom pictured and remodeling it a little.  Justus and I are also throwing around the idea of having our floors professionally refinished upstairs when everything is said and done.  (When Justus asked me what I thought, I nearly passed out with relief!  I think we've learned the hard way that some DIY projects are worth it and some are not!) 

Anyway, enough rambling, I'll keep you posted on the progress as it will be a while before it's finished!   

(And just in case you have some time to spare, here's a link to my Pinterest page where I've posted some really beautiful bathrooms that have inspired me!)

Copyright @ Keeping It Cozy. Blog Design by KotrynaBassDesign