Friday, August 31, 2012

The Weekend Ahead... and Country Living


Happy Labor Day weekend!  What do you have planned for the weekend?  We have a weekend planned full with family and friends!

 Every year Labor Day comes around, I get excited for fall... probably because it's the start of September.  I start thinking of pumpkin patches, cooler evenings and the leaves turning.  And I start longing to get all my fall decorations out!


Well, you're probably wondering why I'm posting again so soon... along with wishing you a happy weekend, I have some blog news I thought I'd share with you.  

It makes me slightly uncomfortable, not because I'm not absolutely thrilled, but because it's kind of hard for me to put the spotlight on myself.  This week I was notified that my little blog was nominated and chosen as a finalist for the Country Living Blue Ribbon Blogger Awards in the lifestyle category.  

What an honor... Country Living has always been my favorite magazine and my go-to source for inspiration in my home.  I've subscribed for years and read it even before I had a home of my own.  So many homes they have shared have influenced the decorating and renovations in our farmhouse.  It's a guarantee I'll have read the magazine front to back the day it comes in the mail and often I'm trying a new recipe the next day.  I can hardly believe they would visit my blog, much less like it!  

Anyway, each category will have a judged winner.  But there's also a Reader's Choice award for the blog that receives the most votes.  Now, believe me, I have no illusions about winning either award (there are some amazing blogs chosen) and I know your time is precious, but if you happen to have the time and would like to vote for Keeping it Cozy, you can click the following button and vote daily between now and September 17.


Thank you so much for your visits, encouraging comments and friendship!  It means more to me than you'll ever know.

Have a wonderful weekend! 

Thursday, August 30, 2012

The Scent of Sunshine


Hi all!  I hope you are all doing well and are safe.  My thoughts have been with those affected by Isaac.  My brother is a lineman and has been traveling where there is storm damage so it seems even all the more real.  

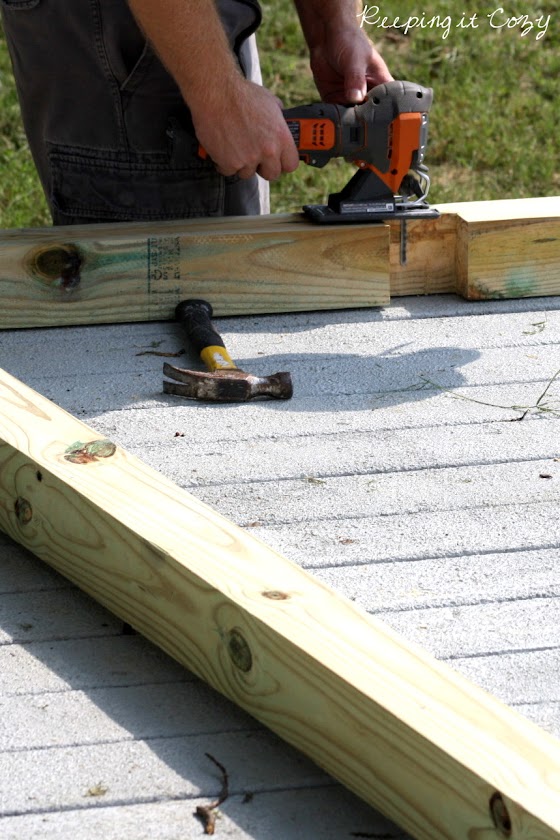
Well, I certainly didn't intend to do a post on a clothesline, but I have never enjoyed doing laundry as much as I have this week.   Last weekend our dryer decided to quit heating... it didn't appear to be a quick fix so the next day while my husband was at work and the clothes were piling up in the hamper (if you are, or have been, a mother of little ones you know what I mean), the wheels started turning and I decided now was the perfect time to build that clothesline that has been on our "to do" list since springtime. 

Next step was convincing my husband, but that didn't take too long (smile).  After all, your dryer uses more energy than just about any other appliance in your home.  Plus who needs to use a dryer when you have the perfectly good use of sunshine and a breeze?


The cost was minimal and the project was finished in a morning.  We only had to purchase 3 4"x4" pressure treated posts, eye screws, a bag of concrete and some cotton line. We will have to buy some tightening mechanisms for the line sometime in the future though.


When my first load of laundry was finished and I went outside to bring it in, the minute I put the clothes up to smell it brought back a flood of memories.  My mom always had clothes on the line when I was growing up.  There truly isn't a fragrance out there that can mimic the true scent of sunshine.


I love having an excuse to venture out for awhile to complete a household chore.  The girls love it too... I've found the past week that I almost always have a helping hand.


Or should I say four helping hands...


 We made the decision to place our clothesline right smack dab in the middle of our backyard, convenient to the house and close to the garden.  There's just enough room for the girls to run around, chase butterflies, and dig around in the dirt. 


I can't really explain why something as simple as a clothesline would make me happy... but I do know each day as I go outside to hang the clothes it feels wonderful to take a little break and soak in the sounds of birds chirping and girls giggling, the reward of a task being completed and the scent of sunshine. 


P.S.  I thought about sharing a few things I've learned since using our clothesline this week, but really all the information you need can be found online!  I spent about ten minutes reading the proper way to hang clothes and linens and it was time well spent... you'll learn everything you need to know about drying your clothes quickly, eliminating wrinkles and stiffness.

Besides, you all are probably the ones that can teach me something!    Tell me... do you use a clothesline?  Do you have memories of using one as a child?  Do you have any tips to share? 

Monday, August 27, 2012

Mint Flavored Lemonade


Hello, friends!  I hope you had a great weekend.  I had many snapshots from the weekend that I downloaded but I couldn't seem to get any thoughts together, so instead all I have to share with you is a lemonade recipe that I have been making for our family the past couple weeks. (I tried to post a photo of our upstairs since the floor is finished, but my husband told me to wait and do a big reveal... can you believe that?!) 

A couple months ago we went to an amazing restaurant that served a house lemonade that without a doubt was the best I had ever had.  A couple weekends ago we had an opportunity to eat there again as we traveled by and I knew I had to try and replicate the lemonade they served... it was seasoned with mint and so fresh.  I think their version may have been fresh-squeezed, but I've been using refrigerated 100% lemon juice that I always have on hand... so much easier and I can throw this together in just a few minutes.  My family drinks this so fast we rarely have it for more than an afternoon. 

Below are the measurements I use but you can vary this depending on your own likes. 

Mint Flavored Lemonade
(Makes approximately half a gallon)

Dissolve 1 cup of sugar in 1 cup of water over medium heat.
Pour about 2 quarts of water into a pitcher and add 1 cup of lemon juice.
Add the sugar syrup to the lemon water in the pitcher and stir.
Toss in a handful of mint leaves and chill.  (If you can wait that long... I never can!)

Thursday, August 23, 2012

Shelf Ledges in our Office


A while back I showed you one side of our upstairs landing area where we built in a bookcase.  Today I thought I'd give you a peek of the opposite wall.  I'm just about finished painting, which means now it's time to work on the fun stuff... decorating!  

Our upstairs landing sits between a bedroom and the playroom.  We actually use this space as an office, but I also wanted this room to be for my girls too, since we spend quite a bit of time upstairs.  My theme as we've been remodeling is "old schoolhouse", and so I was on the hunt for some vintage children's alphabet cards.  I didn't find any actual vintage cards, but I did find these cards at Anthropologie and I absolutely love them.  


I thought and thought about how to display these cards and couldn't come up with anything I was satisfied with.  Then I mentioned it to my husband and he came up with the idea of building a couple ledges for the cards to rest on.  All these ledges are made out of is a pine 1"x4" and quarter round.  The quarter round sits a little higher than the 1"x4" so that the cards have a place to sit. I wanted the warmth of wood in the room, so I opted to stain.  This is a mixture of natural cherry and dark walnut.  (This was my second experience with staining and I definitely think there must be a trick to it, but I have no idea what it is!  Let's just say I think it is much easier to paint!)


The shelf ledges sit above our desk.  This wall seemed so bare and white after painting, so I was thrilled with how much cheerfulness the ledges and cards added.


 The desk is built into the wall and was made by my husband.  As with the built in bookcase, we wanted to build the desk in as well to eliminate bulky furniture in a narrow walkway.


The desk is 8' long and the top is made out of hardwood flooring we found on clearance.  (You can see from all our ugly office equipment we really do use this space as an office... I almost had a hard time posting this picture after viewing so many gorgeous shabby craft rooms around the web!)  You can see here we added a couple schoolhouse light fixtures and I finished painting the stair bannister last weekend. 


The chairs were something we have had sitting in the attic for many years... they were blue with a light oak seat.  I painted them in ASCP Emperor's Silk with a coat of clear and dark wax.  I stained the seats to match the shelf ledges.


Thanks for letting me show you a glimpse of our progress... now I'm anxious to get working on the other projects I have planned for the remaining bare walls!

Hope you have a wonderful weekend.

Sunday, August 19, 2012

Our Town and Reminiscing

 
I hope you have had a wonderful weekend.

This weekend has been a busy one for us around the house... we're almost finished with our upstairs and I can't wait to share it with you.  Then my husband ripped out our previous styrofoam ceiling in the living room and we put up some plank panels.  In the meantime I thought I'd share a few photos of our little town and the story of how we ended up here.

I'll never forget the first time we drove down this road.  It seems so long ago... we were living in the city and my parents lived across the country.  They were visiting and we went out driving, looking for fun at property for sale that my parents could possibly purchase for retirement years.  We ended up on the outskirts of this little town and found the perfect acreage for sale.
I know my husband and I never imagined we would end up here, but I do know I was absolutely charmed by this little old fashioned town and gaped at all the farmhouses as we drove by.    
 
That was seven years ago.  We didn't have any kids, my family all lived hundreds of miles away, we had different jobs, in different stages of life...  How life changes.  
The first time we drove by what would now be our house (a glimpse above), it was for sale.  I thought it was cute but a little small.  Little did I know (smile)! 

As it happened, my parents ended up buying the land that was for sale.  Two and a half years ago, on a brief visit to make sure all was well with their land, we saw this house was on the market again.  On a whim we scheduled an appointment for a viewing and it was love at first sight.  The only way I can describe the feeling as I walked in the front door, was that it was home. 
We hoped but doubted that it would work out.  But we prayed about it and decided to put our house up for sale.  The day before we put it on the market, it sold. 
I love all the old houses here... they are so southern with their front porches.  They range in age... ours is 80 years old and I think the oldest is 130 years old.  A few are no longer lived in, but are still well maintained.
This is our neighbor's house... a Sears home that came in parts on the old railroad years ago.   The stone fence is even older than this home... the original home burned down.
There are a few barns around, some old and some new.
Green grass, corn stalks, hay bales, cows grazing... these are all familiar sights here in the summer.
I told you about this old church a while back.  This is our neighbor on the other side... this church was established back in  1876.  You can see a glimpse of our house in between the church and the church home.
There's also an old railroad station down the road.  At one time this was a booming town!  Unfortunately the station isn't maintained and believe me, it is full of treasures.  (I actually called the owner a couple months ago to see if he would sell me some of the treasures inside... I'll let you know if he ever does!)
And just a mile down the road is my parents land and their beautiful hilltop home they are in the process of building.  It truly is a blessing to have them nearby... they have been here for over a year now.
Thanks for reading along.  I didn't intend to share so much, but I've had a thankful heart this weekend and I couldn't help but reminisce as I uploaded these photos.  Life has not been perfect, as no life is, but there is always much to be thankful for. Our little house in the country has been a haven for us (my husband likes to call it a headache but I know he says that lovingly) and we're grateful to call this town home.

Tuesday, August 14, 2012

Apples and Pie

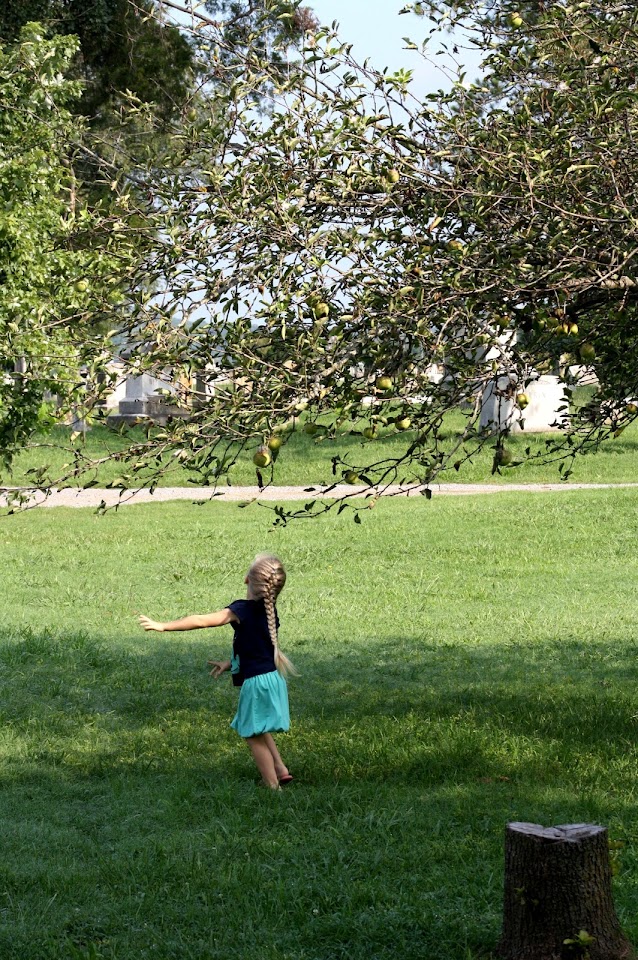
 This past week our neighbor down the road graciously offered to let us pick some apples off her tree.  Jillian and I left one morning with a bucket and picked away.   We used to have an apple tree at our previous house and we miss it... planting an apple tree this year is definitely still on our "to do" list.
 It was a beautiful morning and our neighbor's house on the corner is one of my favorites.  She has flowers and shrubs planted all around and a gorgeous old porch. 
We laughed while picking the apples, especially when one fell on my head (smile). 
That afternoon I had a thousand other things I should have been doing, but I couldn't wait to bake a pie with the apples we had picked. 

If you are intimidated by making your own pie crust, I assure you that I have felt the same, but I've found that the time and effort is truly worth it.  And every time seems to get a little easier...
I usually bake while the girls are napping and the quiet along with the afternoon sun streaming in the windows always feels peaceful. 

I use this recipe by The Pioneer Woman for the crust.  It truly makes the pie.  I see the ingredient list provided online is a little different than the book, which is what I use, but the instructions are the same and the parchment paper trick really works!  Here is the ingredient list I use, which comes from her cookbook :

2 1/2 cups of all-purpose flour
1 teaspoon salt
1 tablespoon sugar
1 cup (2 sticks) cold butter, cut into chunks
1/4 cup cold water (although I've personally found that you need more like 1/2 cup)

Old Fashioned Apple Pie Recipe

Pastry for 2-crust 9-inch pie
2/3 cup sugar
3/4 teaspoon cinnamon
Pinch of salt
6-8 apples, peeled, cored, and sliced
Butter
1 tablespoon sugar for sprinkling on the top crust (I use Turbinado sugar)

Line a 9-inch pie plate with half of the pastry and prick a few times with a fork.  Combine 2/3 cup of sugar, cinnamon and salt.  Place your apples in the pie shell and pour the sugar mixture all over the apples.  Dot with butter (I probably use about 2 Tbsp, sliced thinly).  Place your remaining pastry over the top of the filling.  Flute the edges and cut slits in the top crust.  Sprinkle the remaining 1 tablespoon of sugar over the top crust.  Bake at 425 degrees for 50 minutes.

Saturday, August 11, 2012

ASCP Painted Flag


Hi there!  Well, I couldn't wait to show you the project my mom and I spent the afternoon working on.  Last week my mom attended an Annie Sloan Chalk Paint class and she loved it and learned so much.  I couldn't attend (my babysitter was at the class - ha!) but she promised to share all that she learned with me.  

For a while now I've wanted to paint some sort of flag wall art to hang in our upstairs office area (our "theme" is old schoolhouse).  I've had my eye on the painted American flag they sell at Pottery Barn but didn't want to pay the price they sell it for.  Then my mom had the idea of using the techniques she had learned to paint this flag and we decided to both make one.  

Let me tell you, I fell in love with this paint and all the possibilities.   Now I'm dreaming up everything I can use it on! 

Here's the tutorial if you are interested. 


These are our supplies.  You've probably heard of this paint being expensive, but it does go far and we ordered extra for some additional projects. In the end we calculated this project costing us $26 for each flag and it took us about 3 hours start to finish. 

- Cut piece of pine plywood 26"x48" (which we lightly sanded)
- Coco ASCP
- Emperor's Silk ASCP
- Napoleonic Blue ASCP
- Old White ASCP
- ASCP Clear Wax
- ASCP Dark Wax
- Lots of brushes


The first step is to paint your board with the paint color Coco.  We covered this pretty thoroughly since this is the color that would show through once we distressed the flag. 


Next we drew outlines with a pencil for the stripes and a rectangle for the stars.  Since there are 13 stripes, we measured ours 2" wide.  The rectangle dimensions are 14"x20".


Next we painted the stripes and the rectangle.  (The red paint is Emperor's Silk, the blue is Napoleonic Blue and the white is Old White.)  We didn't worry about the painting being perfect; in fact, we wanted it to look old and distressed so a lot of the Coco background shows through. 


Next came painting the stars.  This was a little more challenging and I don't have one great tip to share with you... I pretty much winged it by measuring and marking with a pencil a spot where each star would be painted. 


We used a "stencil" we made simply by printing out a star onto a piece of cardstock and cutting it out. 


Now came the fun part... the wax!  At this point we could see our flags had potential but my mom promised they were going to look great by the time we used the wax techniques she had learned.

We applied a coat of clear wax all over the flag in a circular motion and followed by buffing it with an old t-shirt. 


Next we distressed with sandpaper.  I only sanded the edges of my flag... the flag already looked very distressed since my painting was deliberately light in some areas. 


Next we used the dark wax to create that old antique look.  I was scared to apply this wax... look how dark it is! 


And when I first applied it I definitely had an "oh no" moment because this was a little more of a primitive look than I wanted  Then my mom remembered she had learned that to remove the dark wax, you can simply apply the clear wax again and buff it out. 


We were so excited then because the look it created was exactly perfect!  If you look closely at the picture above, you can see in the stripes area on the top of the flag that the white has a definite yellow tint... the lower half  has an antique look, but is still white, which is the look that was created by applying the clear wax again and buffing after the dark wax.  Pretty neat! 


We finished by rubbing Kraft paper all over the flag... this creates a sheen and gives the flag a smooth finish. 


I really loved working with Annie Sloan Chalk Paint.  I thought it was amazing how the layers of paint, the distressing, the waxing, all created such an "old" look.  I don't think anybody would ever  guess that this is just plywood!


You'll see my flag again once I figure out how to hang it!  This flag is actually pretty heavy, so I'll let my husband take over now.  (smile)

Hope you are enjoying your weekend!

Copyright @ Keeping It Cozy. Blog Design by KotrynaBassDesign